
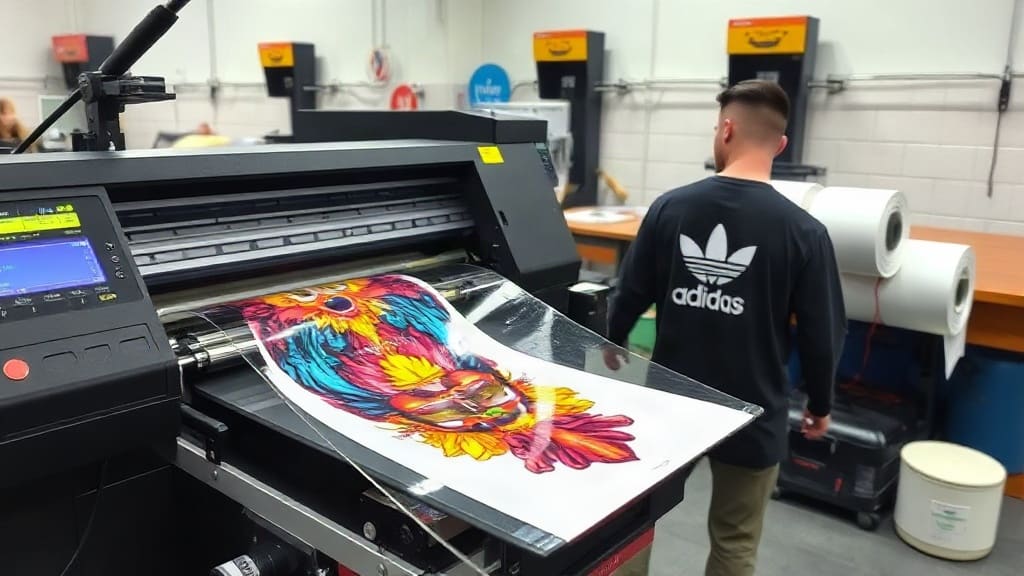
If you're in the custom apparel business, you've likely heard about DTF transfers. This printing method has taken the industry by storm, offering a versatile and cost-effective way to produce vibrant designs on various fabrics. In this comprehensive guide, we'll dive deep into what DTF transfers are, how they work, their advantages over other methods, and practical tips for getting the best results.
What Are DTF Transfers?
DTF stands for Direct to Film. It's a printing technique where a design is printed onto a special PET film using a DTF printer, then transferred onto fabric using a heat press. Unlike traditional screen printing or heat transfer vinyl, DTF allows for full-color prints with high detail and no weeding (removing excess material).
How DTF Transfers Work: The Process Explained
Understanding the process helps you appreciate why DTF is so effective. Here's a step-by-step breakdown:
- Printing: A DTF printer (typically an Epson or Ricoh modified) prints your design onto a clear PET film using CMYK plus white ink. The white layer is crucial because it provides an opaque base for colors to pop on dark fabrics.
- Powdering: While the ink is still wet, a hot-melt adhesive powder is applied to the printed film. This powder sticks to the wet ink.
- Curing: The film is passed through a heat source (like a dryer or oven) to melt the powder into a glue-like layer. This ensures the adhesive activates during the heat press.
- Pressing: The cured film is placed on the fabric (with the powder side facing down) and pressed with a heat press at around 160-170°C (320-340°F) for 10-15 seconds. The heat melts the adhesive, bonding the design to the fabric.
- Peeling: After pressing, you peel off the film either hot or cold, depending on the type of film used. The design remains on the fabric.
Why Choose DTF Transfers? Key Benefits
DTF transfers offer numerous advantages that make them a favorite among printers and entrepreneurs:
- Versatility: DTF works on a wide range of fabrics, including cotton, polyester, blends, and even leather and nylon. It's suitable for t-shirts, hoodies, bags, and more.
- No Weeding: Unlike vinyl, DTF doesn't require weeding (removing excess material around the design). This saves time and labor.
- High Detail and Color: DTF can reproduce complex designs with gradients, small text, and vibrant colors with excellent color opacity.
- Durability: Prints are stretchable and wash-resistant, lasting many washes without cracking or fading.
- Cost-Effective for Small Orders: There are no setup costs like screens, making DTF ideal for short runs and custom one-offs.
- Easy to Use: The process is relatively simple, making it accessible for beginners.
DTF Transfers vs. Other Printing Methods
To understand where DTF fits, compare it with popular alternatives:
DTF vs. Screen Printing
Screen printing is excellent for large quantities due to low per-unit costs, but it requires a setup fee and is impractical for small orders or detailed designs. DTF shines for smaller runs and full-color prints without setup costs.
DTF vs. Direct-to-Garment (DTG)
DTG prints directly on fabric, offering great softness, but it struggles with dark garments without pre-treatment and has slower production times. DTF prints on film, allowing you to print multiple transfers and press them later, increasing efficiency.
DTF vs. Heat Transfer Vinyl (HTV)
HTV is limited to solid colors and requires weeding. DTF offers full-color, detailed prints without weeding, making it more flexible for complex designs.
Essential Materials for DTF Transfers
To start with DTF, you'll need the following:
- DTF Printer: Modified Epson or Ricoh printers with DTF ink and white ink circulation.
- DTF Inks: Specialized pigment inks that adhere to film and fabric.
- PET Film: Coated film that accepts ink and releases easily.
- Adhesive Powder: Hot-melt powder that activates under heat.
- Heat Press: A quality heat press with even pressure and temperature control.
- Curing Oven or Dryer: For melting the powder (though some use a heat press with a Teflon sheet).
Step-by-Step Guide to Making Your Own DTF Transfers
If you're ready to produce DTF transfers, follow these steps:
- Design: Create your design in software like Photoshop or Illustrator. Ensure the resolution is at least 300 DPI. Save as PNG with transparency.
- Print: Load the PET film into the printer. Print your design with the correct settings (usually a white underbase).
- Apply Powder: Immediately after printing, sprinkle the adhesive powder over the wet ink. Ensure full coverage, especially on the white layer.
- Cure: Place the film in a curing oven or heat press at around 160°C for 1-2 minutes to melt the powder. Let it cool.
- Press: Place the transfer on your garment (powder side down) and press with heat press at 160-170°C for 10-15 seconds with medium pressure.
- Peel: Peel the film while it's still warm (or cold for some films). Your transfer is done!
Tips for Perfect DTF Transfers
To achieve professional results, keep these tips in mind:
- Use High-Quality Inks: Cheap inks can lead to poor adhesion and cracking.
- Adjust for Fabric Type: Different fabrics may require varying press times and temperatures. Test on a sample first.
- Keep Prints Flat: After peeling, place the garment on a flat surface and let it cool to avoid wrinkles.
- Store Transfers Properly: Keep unused transfers in a cool, dry place away from humidity.
- Wash Care: Instruct customers to wash garments inside out in cold water and avoid ironing directly on the print.
Cost Considerations and Profitability
One of the biggest draws of DTF transfers is the low startup cost compared to other methods. A basic DTF setup can be as low as $3,000, including a printer and supplies. For small businesses, this makes DTF an accessible way to offer custom apparel. Per transfer, the cost is typically $1-$3 depending on size and ink coverage, allowing for healthy profit margins when selling custom shirts.
Troubleshooting Common DTF Issues
Even experienced printers encounter problems. Here are common issues and solutions:
- Low Adhesion: Increase press time or temperature, or ensure powder is applied evenly.
- Peeling After Wash: Use better quality powder or increase curing time.
- Colors Fading: Check if your white layer is too thin; add more ink coverage.
- Film Sticking to Fabric: Use a lower pressure or a release film (like parchment paper) between the press and the transfer.
Frequently Asked Questions
Can DTF transfers be used on any fabric?
Yes, DTF transfers work on a vast array of fabrics including cotton, polyester, and blends. They also adhere well to materials like leather and nylon, though you should test first.
How durable are DTF transfers?
With proper application and washing care, DTF transfers can last hundreds of washes. They are stretchable and resistant to cracking.
Do I need a special printer for DTF?
Yes, you need a DTF printer, which is typically a modified Epson or Ricoh that supports white ink and film printing. You cannot use a regular inkjet.
Can I make DTF transfers at home?
Absolutely! Many hobbyists and small businesses produce DTF transfers at home with a desktop DTF printer and a heat press.
How do I store unused DTF transfers?
Keep them flat in a cool, dry place away from direct sunlight. Avoid folding them to prevent creases.
Conclusion
DTF transfers have revolutionized the custom printing industry with their versatility, ease of use, and affordability. Whether you're a seasoned printer or just starting, understanding the process and best practices will help you create high-quality, durable prints. With the right equipment and a bit of practice, you can produce stunning custom apparel that meets your clients' expectations. So why not give DTF transfers a try? You might find it becomes your go-to printing method.